The Ultimate Guide to Harvesting and Storing Mushrooms – Expert Tips and Techniques
Introduction of proper mushroom harvesting and storage

Importance of proper mushroom harvesting and storage
Proper mushroom harvesting and storage techniques are essential for preserving the quality, flavor, and nutritional value of your precious fungi. By following these practices, you can extend the shelf life of your harvested mushrooms and ensure they remain safe for consumption. Whether you’re a seasoned mushroom enthusiast or a beginner, understanding the significance of proper harvesting and storage is the first step towards enjoying a bountiful and flavorsome mushroom harvest.
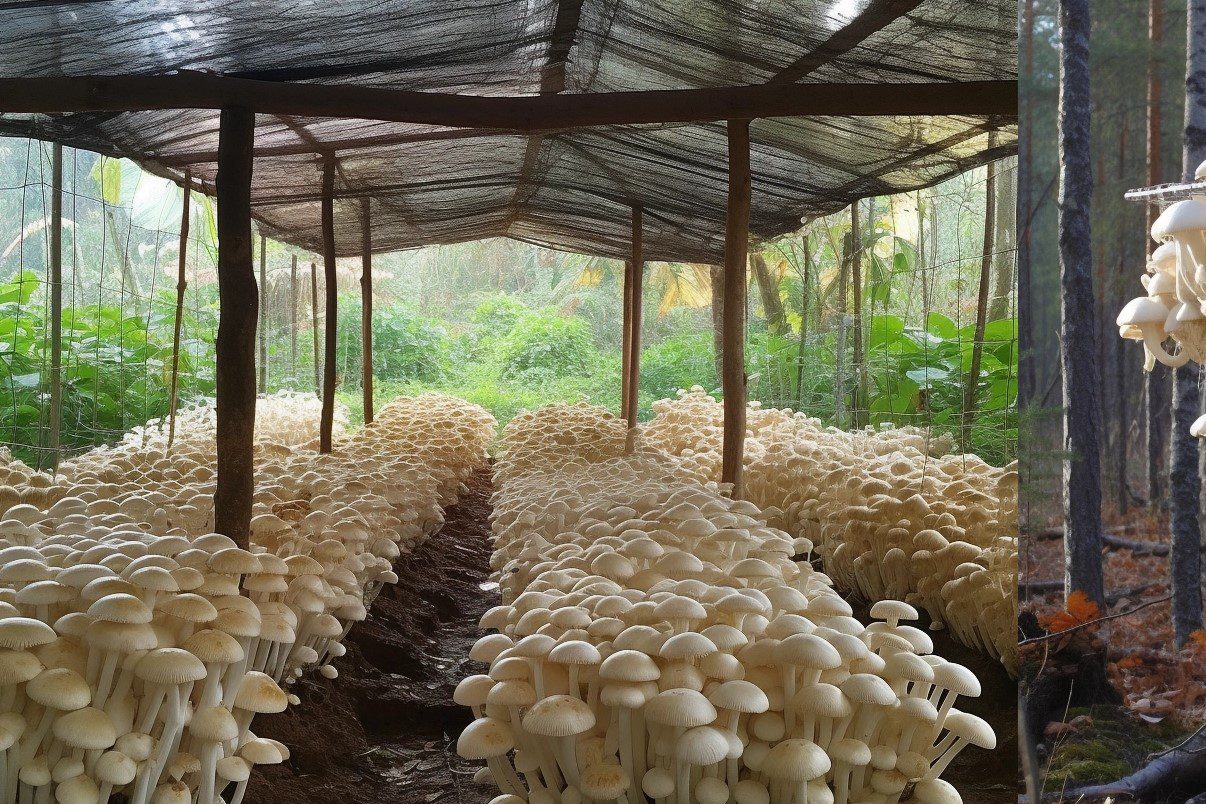
Benefits of homegrown mushrooms
Homegrown mushrooms offer a range of benefits that make them a popular choice among gardening and culinary enthusiasts. Here are some key advantages of growing mushrooms at home:
- Superior flavor and freshness: Harvesting mushrooms at their peak ripeness allows you to experience their exceptional flavor and aroma. The unmatched freshness of homegrown mushrooms elevates the taste of your dishes to a whole new level.
- Variety and diversity: When you grow mushrooms at home, you have the freedom to choose from a wide array of mushroom species. From popular varieties like button mushrooms and oyster mushrooms to exotic types like shiitake or lion’s mane, you can explore a diverse range of flavors and textures.
- Sustainable and eco-friendly: Growing your own mushrooms promotes sustainability by reducing the environmental impact associated with commercial mushroom production. It eliminates the need for long-distance transportation and minimizes packaging waste.
- Nutritional value: Mushrooms are a nutrient-rich food source. They are low in calories and fat, high in protein, and packed with essential vitamins, minerals, and antioxidants. By growing your own mushrooms, you can ensure a fresh supply of wholesome and nutritious ingredients for your meals.
- Cost-effective: Cultivating mushrooms at home can be a cost-effective alternative to purchasing them from stores. With minimal investment in supplies and equipment, you can yield a significant harvest, saving money in the long run.
- Educational and engaging: Growing mushrooms offers a unique learning experience. It allows you to understand the fascinating process of fungal growth and cultivation. It’s a hands-on activity that can be enjoyed by individuals of all ages, making it a great educational and engaging hobby.
By reaping the benefits of homegrown mushrooms, you can enhance your culinary creations, promote sustainability, and enjoy the rewarding experience of nurturing your own food source.


Understanding Mushroom Harvesting
Types of Mushrooms and Their Growth Characteristics
Different mushroom varieties and their unique growth requirements
Factors to consider when choosing the type of mushroom to cultivate
When deciding on the type of mushrooms to cultivate, several factors should be considered. Here are some key factors to take into account:
- Growing Environment: Different mushroom species have specific environmental requirements. Consider factors such as temperature, humidity, light, and ventilation in your growing space. Choose mushroom varieties that thrive in the conditions you can provide.
- Skill Level and Experience: Some mushroom species are more forgiving and easier to cultivate, making them suitable for beginners. If you are new to mushroom cultivation, start with beginner-friendly varieties like oyster mushrooms or white button mushrooms. As you gain experience and confidence, you can explore more challenging species.
- Purpose and Use: Determine the purpose of your mushroom cultivation. Are you growing them for personal consumption, culinary experiments, medicinal purposes, or for commercial sale? Different mushroom varieties offer unique flavors, textures, and medicinal properties, so choose accordingly based on your intended use.
- Availability of Spawn and Substrate: Consider the availability of mushroom spawn (the mycelium used for cultivation) and suitable substrates (growing mediums). Certain mushroom species may require specific types of substrates, such as wood logs, straw, or compost. Ensure that the necessary materials are accessible for your chosen mushroom variety.
- Market Demand: If you plan to sell your cultivated mushrooms, research the market demand in your area. Identify popular mushroom varieties that are in high demand among consumers, restaurants, or local markets. This can help you make informed decisions and potentially generate income from your cultivation efforts.
- Personal Preferences: Consider your own preferences as well. Do you have a particular affinity for a specific mushroom variety? Are there certain flavors, textures, or culinary uses that you find appealing? Cultivating mushrooms that align with your personal preferences can make the process more enjoyable and rewarding.
By considering these factors, you can select the most suitable mushroom varieties for your cultivation project, ensuring a higher chance of success and satisfaction in your mushroom-growing journey.
Harvesting Readiness
Indications that mushrooms are ready for harvest
Knowing the right time to harvest mushrooms is crucial to ensure optimal flavor, texture, and nutritional value. Here are some indications that mushrooms are ready for harvest:
- Cap Expansion: Monitor the growth of the mushroom caps. As they mature, the caps will expand and reach their maximum size. Once the caps stop growing and start to flatten out or slightly curl upwards, it’s a sign that they are ready for harvest.
- Veil Separation: Some mushroom species have a protective membrane called a veil that connects the cap to the stem. When the veil begins to break or separate from the cap’s edges, it suggests that the mushrooms are mature and can be harvested. This is particularly noticeable in species like button mushrooms or portobellos.
- Spore Drop: Certain mushroom species develop distinct spore-bearing structures on the underside of their caps. As the mushrooms mature, these structures release spores. Once you notice a visible spore drop, typically indicated by a darkening or colored deposit underneath the caps, it’s a good time to harvest the mushrooms.
- Firm Texture: Gently touch the mushrooms to assess their texture. Mature mushrooms should feel firm and have a slight resistance when pressed. Mushrooms that feel too soft or mushy may have passed their prime and should be harvested promptly to avoid deterioration.
- Color Changes: Pay attention to any color changes in the mushrooms. Different mushroom species exhibit specific color transformations as they mature. Familiarize yourself with the color characteristics of the mushrooms you are growing and harvest them when they reach their desired color or just before they start to fade or darken.
Remember that the optimal harvest time may vary depending on the mushroom species and growing conditions. It’s always best to consult species-specific guides or resources to ensure accurate timing for harvesting each type of mushroom.
Proper timing to maximize flavor and nutritional value
Harvesting mushrooms at the right moment plays a significant role in enhancing both the flavor and nutritional value. Here’s why:
- Flavor Optimization: Mushrooms have a distinct flavor profile that develops as they mature. Harvesting them at the ideal stage allows you to capture their peak flavor. Mushrooms harvested too early may lack the full depth of flavor, while those harvested too late might have a diminished taste or even start to deteriorate. By harvesting at the right moment, you can enjoy mushrooms with a rich, robust flavor that enhances the culinary experience.
- Texture and Tenderness: The timing of harvest also impacts the texture of mushrooms. Mushrooms that are harvested at the optimal stage tend to have a desirable texture—neither too firm nor too soft. The right moment ensures they are tender and pleasant to bite into, contributing to an enjoyable dining experience.
- Nutrient Density: Mushrooms are renowned for their nutritional value, containing various essential vitamins, minerals, and antioxidants. Harvesting at the right moment ensures that you capture the mushrooms when their nutrient content is at its peak. As mushrooms mature, they accumulate more nutrients, including vitamins B, D, and minerals like potassium and selenium. By harvesting them at the ideal stage, you maximize the nutritional benefits they offer.
- Preservation of Quality: Mushrooms are delicate and highly perishable. Harvesting them promptly ensures that they retain their quality and freshness. If mushrooms are left on the growing substrate for too long, they may become susceptible to decay or loss of flavor. Harvesting at the right moment helps preserve their quality, allowing you to enjoy mushrooms at their best.
By harvesting mushrooms at the optimal stage, you unlock their full potential in terms of flavor, texture, and nutritional value. It allows you to savor the unique taste of each variety while reaping the maximum health benefits they provide.
Harvesting Techniques
Step-by-step instructions for safely harvesting mushrooms
Safely harvesting mushrooms is crucial to ensure your well-being and to protect the environment. Here are step-by-step instructions to guide you through the process:
Mushroom Identification:
- Educate yourself on mushroom identification using reliable resources, such as field guides or expert advice.
- Start with easily recognizable and safe-to-consume mushroom species.
- Never consume wild mushrooms unless you are certain of their identification.
Gather Essential Tools:
- Prepare a sharp knife or mushroom-cutting tool for clean cuts.
- Use a basket or breathable bag to collect mushrooms, allowing for spore dispersal.
Choose the Right Time:
- Harvest mushrooms when they are at their prime, typically when caps have fully expanded but not yet flattened or started to deteriorate.
- Early morning is often the best time to harvest, as moisture levels are higher.
Handle with Care:
- Gently twist or cut mushrooms at the base of the stem to avoid damaging the mycelium (the underground fungal network).
- Avoid pulling mushrooms from the ground or disturbing the surrounding environment unnecessarily.
Leave No Trace:
- Fill any holes or divots left by mushroom removal to promote the regeneration of the area.
- Preserve the natural habitat by minimizing your impact on the surrounding flora and fauna.
Separate Edible and Inedible:
- As you collect mushrooms, separate edible varieties from inedible or poisonous ones.
- Carry a guidebook or consult an expert to assist with on-the-spot identification if needed.
Properly Store Harvested Mushrooms:
- Place harvested mushrooms in a breathable container, such as a paper bag or mesh bag, to maintain freshness.
- Avoid using airtight plastic bags, as they can cause moisture buildup and spoilage.
Clean and Prepare:
- Before consuming or storing mushrooms, gently brush off any debris or dirt using a soft brush or cloth.
- Avoid washing mushrooms unless necessary, as they can absorb excess water and lose flavor.
Remember, if you are uncertain about the identification or safety of a mushroom, it’s best to err on the side of caution and avoid consumption. Harvesting mushrooms responsibly ensures your safety and promotes the sustainability of mushroom populations for future foraging endeavors.
Tools and equipment required for efficient harvesting
Efficient harvesting of mushrooms requires the right tools and equipment to ensure a smooth and successful process. Here are some essential tools and equipment for efficient mushroom harvesting:
- Sharp Knife or Mushroom-Cutting Tool: A sharp knife or specialized mushroom-cutting tool is essential for cleanly and safely separating mushrooms from their growing medium. Choose a tool with a sharp, narrow blade that allows precise cuts without damaging the mushrooms or the mycelium.
- Basket or Breathable Bag: Use a basket or breathable bag to collect harvested mushrooms. These containers allow for air circulation, preventing moisture buildup and maintaining the mushrooms’ quality. Avoid using plastic bags, as they can trap moisture and lead to spoilage.
- Field Guide or Mushroom Identification Resources: Carry a reliable field guide or use mushroom identification resources, such as books or mobile apps, to assist in identifying different mushroom species. These resources help ensure accurate identification and prevent the harvesting of potentially harmful or inedible mushrooms.
- Gloves and Hand Sanitizer: Wearing gloves while handling mushrooms can protect them from potential contaminants on your hands. Additionally, having hand sanitizer available helps maintain hygiene and minimize the risk of cross-contamination.
- Brush or Soft Cloth: Carry a soft brush or cloth to gently remove any debris or dirt from the harvested mushrooms. This helps to keep them clean and preserve their quality.
- Containers for Storage: Depending on the quantity and type of mushrooms you harvest, you may need containers for storing them. Choose breathable containers like paper bags or mesh bags that allow for air circulation and prevent moisture buildup.
- Optional: Foraging Knife or Trowel: If you plan to harvest mushrooms growing on the ground or buried in leaf litter, a foraging knife or trowel can be useful for carefully excavating and extracting the mushrooms without damaging their delicate structures.
Having these tools and equipment readily available will streamline your mushroom harvesting process, ensuring efficiency and preserving the quality of the harvested mushrooms. Remember to clean and maintain your tools after each use to prevent the spread of contaminants and ensure their longevity.
Best practices to minimize damage to the mushroom’s structure
Minimizing damage to the mushroom’s structure during harvesting is essential to preserve their quality and prevent unnecessary waste. Here are some best practices to follow in order to minimize damage:
- Use a Sharp and Clean Cutting Tool: Ensure that your knife or mushroom-cutting tool is sharp and clean before harvesting. A sharp tool allows for clean cuts, minimizing damage to the mushroom’s structure. Clean the tool between cuts to prevent the spread of contaminants.
- Cut, Don’t Pull: Instead of pulling mushrooms from the ground or substrate, use a gentle twisting or cutting motion to separate them from the mycelium. Pulling can cause damage to the delicate mycelial network and impact future mushroom growth.
- Trim Stems Carefully: If mushrooms have long or tough stems, trim them with a clean cut near the base. Avoid breaking or tearing the stems, as this can damage the mushroom’s overall structure.
- Handle Mushrooms with Care: Handle mushrooms delicately to avoid bruising or crushing them. Excessive handling or squeezing can cause tissue damage and affect their appearance and texture.
- Avoid Stepping on or Damaging Surrounding Area: Be mindful of your surroundings while harvesting mushrooms. Avoid stepping on or damaging the surrounding vegetation or habitat, as this can disrupt the ecosystem and impact future mushroom growth.
- Leave No Trace: After harvesting, fill any holes or divots left by mushroom removal to promote the regeneration of the area. Leave the environment as you found it, ensuring minimal impact on the natural surroundings.
- Separate Mushrooms Properly: Separate harvested mushrooms carefully to avoid damage. Place them in a breathable container or basket, ensuring they have enough space to prevent overcrowding or compression.
- Handle Mushrooms with Gloves: Consider wearing gloves while handling mushrooms to protect them from potential contaminants on your hands. Gloves can provide an extra layer of protection and minimize the risk of damage during handling.
By following these best practices, you can minimize damage to the mushroom’s structure during harvesting, preserving their visual appeal, texture, and overall quality. Remember, treating mushrooms with care not only enhances your enjoyment but also promotes sustainable foraging practices.
Preparing for Mushroom Storage
Cleaning and Sorting
Importance of cleaning mushrooms before storage
Cleaning mushrooms before storage is essential for maintaining their quality, extending their shelf life, and ensuring food safety. Here are the key reasons why cleaning mushrooms before storage is important:
- Remove Dirt and Debris: Mushrooms, being grown in natural environments, can accumulate dirt, soil particles, and other debris. Cleaning them before storage helps remove these unwanted substances, keeping the mushrooms clean and visually appealing.
- Prevent Microbial Growth: Mushrooms are highly perishable and prone to microbial growth. Cleaning removes potential contaminants that can harbor bacteria, molds, or other microorganisms, reducing the risk of spoilage and extending their freshness.
- Maintain Flavor and Aroma: Dirt, debris, or remnants of decaying mushrooms can negatively impact the flavor and aroma of fresh mushrooms. Cleaning helps preserve their natural taste and aroma, allowing you to fully enjoy their culinary potential.
- Ensure Food Safety: Properly cleaning mushrooms minimizes the risk of foodborne illnesses. Removing any potential contaminants helps eliminate harmful bacteria or pathogens that might be present on the surface of the mushrooms, ensuring they are safe for consumption.
- Reduce Moisture Content: Mushrooms are naturally high in water content. Cleaning them before storage helps remove excess moisture that can lead to quick spoilage. Damp mushrooms are more susceptible to mold growth and can develop a slimy texture, making them unfit for consumption.
- Prolong Shelf Life: By cleaning mushrooms, you create an environment less conducive to microbial growth and decay. This helps extend their shelf life, allowing you to enjoy them for a longer period.
- Visual Appeal: Clean mushrooms are visually appealing, both for personal enjoyment and when presenting them in recipes or dishes. Removing dirt and debris enhances their appearance, making them more appetizing.
When cleaning mushrooms, it’s important to follow proper techniques. Use a soft brush or cloth to gently remove dirt, debris, or any clinging particles. Avoid excessive washing, as mushrooms are porous and can absorb water, leading to a loss of texture and flavor. Only rinse them briefly if necessary, and pat them dry with a paper towel before storage.
By cleaning mushrooms before storage, you ensure their cleanliness, safety, and quality, allowing you to fully appreciate their natural flavors and textures.
Proper techniques for cleaning different types of mushrooms
Cleaning different types of mushrooms requires specific techniques to ensure their delicate structures are preserved and their flavors are not compromised. Here are proper cleaning techniques for some common types of mushrooms:
Button Mushrooms and Cremini Mushrooms:
- Wipe the mushrooms gently with a damp paper towel or a soft-bristled brush to remove any dirt or debris.
- Avoid soaking or rinsing them in water, as they can absorb moisture and become slimy.
Shiitake Mushrooms:
- Wipe the mushrooms with a slightly damp paper towel or a soft brush to remove any dirt or debris.
- Trim the tough stems, if desired, before cooking.
Portobello Mushrooms:
- Use a soft brush or a damp cloth to gently remove any dirt or debris from the mushroom caps.
- Trim the stem and remove the gills, if desired, before cooking.
Oyster Mushrooms:
- Tear or cut the mushrooms into smaller clusters or individual pieces.
- Rinse them briefly under cold running water to remove any dirt or debris.
- Pat them dry with a paper towel or a clean cloth.
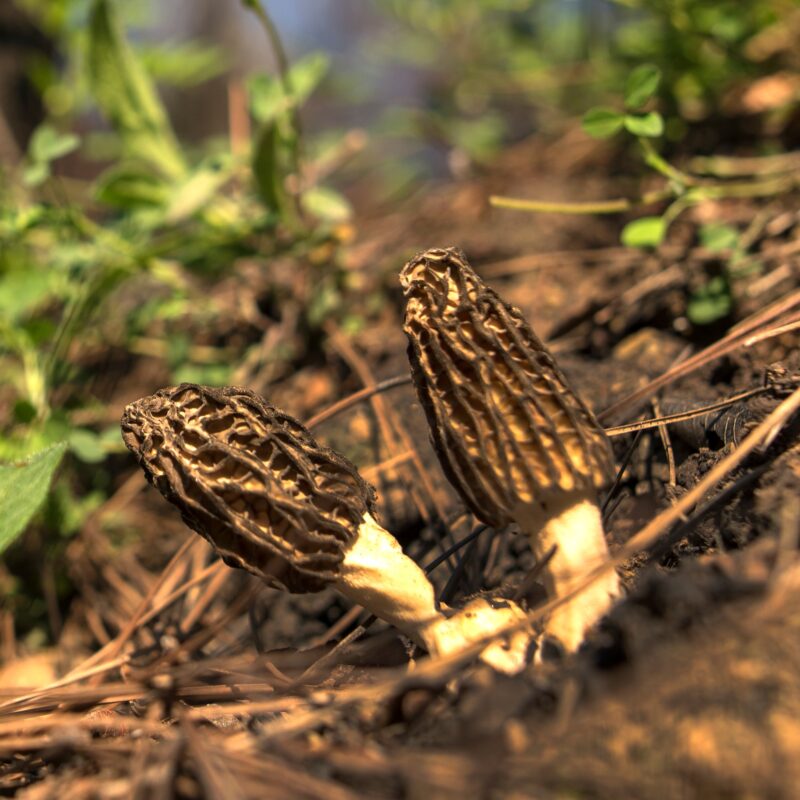
Morel Mushrooms:
- Gently brush off any dirt or debris with a soft brush or a mushroom brush.
- Some recommend briefly soaking morel mushrooms in saltwater to remove any hidden insects or debris. However, this is optional and should be done for a short duration (e.g., 15-20 minutes) to prevent water absorption.
Wild Mushrooms:
Cleaning techniques for wild mushrooms vary based on the specific species. It is best to consult reliable mushroom identification resources or seek guidance from experienced foragers to determine the most suitable cleaning method for each wild mushroom variety.
General Tips for Cleaning Mushrooms:
- Avoid excessive rinsing or prolonged soaking, as mushrooms can absorb water and lose their texture and flavor.
- Trim or remove tough stems, if desired, before cleaning.
- Check for any damaged or spoiled parts and discard them.
- Clean mushrooms just before using or storing to maintain their freshness.
Remember, different mushrooms may have specific cleaning requirements, so it’s essential to refer to reliable resources or seek guidance from experts if you are unsure about cleaning a particular mushroom variety. Proper cleaning ensures that your mushrooms are ready for cooking and maintains their quality and taste.
Sorting methods to remove damaged or spoiled mushrooms
Sorting mushrooms to remove damaged or spoiled ones is an important step in ensuring the quality and freshness of your harvest. Here are some effective sorting methods to identify and remove damaged or spoiled mushrooms:
- Visual Inspection: Carefully examine each mushroom individually for any visible signs of damage or spoilage. Look for mold, discoloration, slime, bruises, or other abnormalities on the caps and stems. Remove any mushrooms that show these signs.
- Touch and Texture: Feel the texture of the mushrooms with your fingertips. Mushrooms that feel slimy, excessively soft, or have a mushy texture are likely spoiled and should be discarded. Mushrooms should have a firm texture when gently pressed.
- Smell Test: Take a moment to sniff the mushrooms. Fresh mushrooms have a mild, earthy aroma. If you detect any off smells, such as a sour or unpleasant odor, it may indicate spoilage, and those mushrooms should be removed.
- Separate Damaged Portions: For mushrooms with minor damage or spots, you can salvage the undamaged portions by carefully trimming or cutting away the affected areas. However, if the damage is extensive or the mushroom is significantly spoiled, it’s best to discard the entire mushroom.
- Grouping by Quality: Sort the mushrooms into different groups based on their quality. Create separate piles or containers for pristine, slightly damaged, and heavily damaged or spoiled mushrooms. This helps to prioritize the use of mushrooms based on their freshness and condition.
- Regularly Clean Sorting Surfaces: Clean your sorting surfaces, such as cutting boards or trays, between each batch of mushrooms to prevent cross-contamination and maintain hygiene.
- Proper Disposal: Dispose of the damaged or spoiled mushrooms properly, either by composting or disposing of them in a waste bin. Do not leave them mixed with the fresh mushrooms, as they can cause faster spoilage.
By using these sorting methods, you can identify and remove damaged or spoiled mushrooms, ensuring that only fresh and high-quality mushrooms are used for cooking or storage. Regular sorting helps maintain the overall quality and flavor of your mushroom harvest.
Preparing Mushrooms for Storage
Strategies to extend the shelf life of harvested mushrooms
Extending the shelf life of harvested mushrooms is essential to maximize their freshness and prevent spoilage. Here are some strategies to help prolong the shelf life of mushrooms:
- Harvest at the Right Time: Harvest mushrooms when they are at their peak freshness. Overripe or mature mushrooms have a shorter shelf life. Timing your harvest appropriately ensures that you start with the freshest mushrooms possible.
- Handle Mushrooms with Care: Handle mushrooms gently to minimize bruising and damage. Rough handling can accelerate deterioration and spoilage. Avoid dropping or piling heavy objects on top of the mushrooms.
- Proper Storage Temperature: Store mushrooms in a cool place, ideally between 36°F (2°C) and 46°F (8°C). Avoid storing them near heat sources or in areas with temperature fluctuations. A cool temperature slows down the natural aging process and helps preserve their quality.
- Use Breathable Containers: Place mushrooms in breathable containers, such as paper bags or mesh bags, to allow air circulation. Avoid using airtight plastic containers, as they can trap moisture and promote mold growth.
- Moisture Control: Mushrooms are highly perishable and prone to moisture-related issues. Ensure that the storage environment is not excessively humid or damp. Excess moisture can lead to mold growth and spoilage. If condensation forms in the storage container, gently wipe it away.
- Avoid Washing until Ready to Use: While it’s important to remove visible dirt or debris, avoid washing mushrooms until you’re ready to use them. Excess moisture can accelerate spoilage. Instead, gently brush off any dirt or wipe them with a damp cloth before cooking.
- Use or Preserve Mushrooms Promptly: Freshness deteriorates over time, so plan to use or preserve harvested mushrooms as soon as possible. If you’re unable to use them immediately, consider preserving techniques such as drying or freezing to extend their shelf life.
- Regularly Check for Spoilage: Regularly inspect the stored mushrooms for any signs of spoilage, such as mold growth, sliminess, or off odors. Remove any spoiled mushrooms promptly to prevent them from affecting the rest of the batch.
- Avoid Mixing Different Mushroom Types: Some mushroom varieties have different storage requirements. To prevent cross-contamination or accelerated spoilage, store different mushroom types separately.
- Consume Mushrooms in Order of Freshness: If you have multiple batches of mushrooms, prioritize using the older ones first. This way, you can enjoy them at their peak freshness while minimizing waste.
By following these strategies, you can significantly extend the shelf life of harvested mushrooms, allowing you to enjoy their freshness and flavors for a longer period. Remember that proper storage and handling practices are crucial in maintaining the quality of mushrooms.
Trimming and cutting techniques for optimal storage conditions
Proper trimming and cutting techniques play a vital role in maintaining the optimal storage conditions for mushrooms. Here are some techniques to follow for trimming and cutting mushrooms to maximize their shelf life:
- Remove the Stems: For most mushroom varieties, it is advisable to trim or remove the tough or woody stems. The stems can be less flavorful and have a different texture compared to the caps. Use a sharp knife or your fingers to gently twist and separate the stem from the cap. Trim the stem close to the cap, leaving just enough for a clean appearance.
- Cut Uniformly: When slicing mushrooms, aim for uniform thickness to ensure even cooking and consistent texture. This is especially important when you plan to use the mushrooms in recipes that require even cooking, such as stir-fries or sautés. Use a sharp knife to make clean, even slices.
- Slice or Dice as Needed: Consider the recipe or dish you intend to prepare when deciding on the cutting style. Slicing mushrooms into thin, even slices works well for dishes like salads or sandwiches. Dicing mushrooms into smaller pieces is suitable for soups, stews, or recipes that call for bite-sized mushroom pieces.
- Minimize Surface Area: When cutting mushrooms, try to minimize the exposed surface area as much as possible. This helps reduce moisture loss and slows down oxidation, preserving their freshness and preventing browning. Avoid crushing or pressing the mushrooms excessively during cutting.
- Keep Caps Intact: If you plan to store whole mushrooms, it’s best to keep the caps intact. The cap serves as a protective layer for the mushroom, helping to retain moisture and prevent drying. Avoid removing or damaging the cap during trimming or cutting.
- Store Trimmed Mushrooms Properly: Once you have trimmed or cut the mushrooms, transfer them to a suitable storage container. Use breathable containers like paper bags or mesh bags that allow for air circulation. Avoid overcrowding the mushrooms, as it can lead to increased moisture and accelerated spoilage.
- Refrigerate promptly: After trimming and storing the mushrooms, place them in the refrigerator as soon as possible. The cool temperature helps to slow down the aging process and maintain their quality.
Remember to practice proper hygiene and use clean cutting surfaces and utensils when handling mushrooms. Regularly sanitize your equipment to prevent cross-contamination and maintain food safety.
By employing these trimming and cutting techniques, you can optimize the storage conditions for mushrooms, preserving their freshness, texture, and flavor for an extended period.
Recommended storage containers and packaging materials
Choosing the right storage containers and packaging materials is crucial for maintaining the freshness and quality of mushrooms. Here are some recommended options:
- Breathable Containers: Opt for breathable containers that allow air circulation, preventing moisture buildup and reducing the risk of mold growth. Examples include:
- Paper Bags: Use plain paper bags or mushroom-specific paper bags with ventilation holes. These allow for airflow while protecting the mushrooms from direct light.
- Mesh Bags: Consider using mesh produce bags or mesh storage bags designed for mushrooms. They provide adequate ventilation and help prevent condensation.
- Perforated Plastic Containers: If you prefer using plastic containers, select those with perforations or ventilation holes. These containers allow some airflow while still protecting the mushrooms from excessive moisture. Look for containers specifically designed for storing mushrooms.
- Sustainable Packaging Materials: Consider eco-friendly options for packaging and storing mushrooms. Biodegradable or compostable containers made from materials like bamboo, sugar cane, or plant-based plastics can be used. These materials allow for airflow while reducing environmental impact.
- Mushroom-Specific Storage Containers: Some specialized containers are specifically designed for storing mushrooms. They often feature breathable lids or ventilation systems to maintain optimal conditions.
- Wax Paper or Parchment Paper: For storing sliced or diced mushrooms, you can use wax paper or parchment paper as a liner in a regular storage container. These papers allow some airflow while protecting the mushrooms.
- Avoid Airtight Containers: It is generally best to avoid airtight containers for storing fresh mushrooms. Airtight containers can trap moisture and lead to faster spoilage. However, airtight containers can be suitable for storing dried mushrooms.
Remember to choose containers that are clean and free from any residual odors or contaminants. Before using any packaging material, ensure that it is food-safe and does not contain chemicals or coatings that may affect the mushrooms’ quality.
Additionally, when packaging mushrooms for sale or transportation, use appropriate packaging materials to protect them from bruising or damage. This can include sturdy cardboard boxes, cushioning materials like bubble wrap or packing paper, and careful arrangement to minimize movement during transport.
By using suitable storage containers and packaging materials, you can help maintain the ideal storage conditions for mushrooms, prolong their shelf life, and ensure their quality and freshness are preserved.
Mushroom Storage Methods
Refrigeration
Guidelines for storing mushrooms in the refrigerator
Proper storage in the refrigerator is essential to maintain the freshness and quality of mushrooms. Follow these guidelines for storing mushrooms in the refrigerator:
- Preparation: Before storing mushrooms, ensure they are clean and dry. Remove any dirt or debris using a soft brush or a damp cloth. Avoid soaking or rinsing them in water, as excess moisture can lead to faster spoilage.
- Breathable Container: Place the mushrooms in a breathable container to allow for airflow. Options include paper bags, mesh bags, or mushroom-specific storage containers with ventilation. Avoid airtight containers, as they can trap moisture and promote mold growth.
- Avoid Overcrowding: Arrange the mushrooms in a single layer or loosely pack them to prevent overcrowding. Overcrowding can lead to moisture buildup and increase the chances of spoilage. If you have a large quantity, consider using multiple containers or storage compartments.
- Cool Storage: Place the container of mushrooms in the refrigerator’s main compartment, ideally in the crisper drawer or on a low shelf. The temperature range of 36°F (2°C) to 46°F (8°C) is optimal for mushroom storage. Avoid storing them near the refrigerator’s door, as temperature fluctuations can occur.
- Separation from Strong Odors: Mushrooms can absorb odors easily, so store them away from strong-smelling foods like onions, garlic, or pungent cheeses. This helps to preserve their natural flavor and aroma.
- Regular Inspection: Periodically check the stored mushrooms for any signs of spoilage. Look for mold growth, sliminess, or any off odors. If you notice any spoiled mushrooms, remove them promptly to prevent contamination of the rest.
- Use within a Few Days: Fresh mushrooms are best consumed within a few days of storage. While their shelf life can vary depending on the variety and freshness at the time of purchase, aim to use them within 3 to 5 days for optimal flavor and texture.
- Preserve if Needed: If you can’t use all the mushrooms within a few days, consider preserving methods such as drying or freezing. Dried mushrooms can be stored in airtight containers, while frozen mushrooms should be blanched, cooled, and stored in freezer-safe bags or containers.
Remember that mushrooms are highly perishable, so it’s important to handle and store them properly to maintain their quality. Following these guidelines will help extend their shelf life and ensure you can enjoy fresh mushrooms for as long as possible.
Ideal temperature and humidity levels for different mushroom varieties
Different mushroom varieties have varying temperature and humidity requirements for optimal storage. Here are the ideal temperature and humidity ranges for some common mushroom types:
Button Mushrooms (Agaricus bisporus):
- Temperature: 32°F (0°C) to 36°F (2°C)
- Humidity: 90% to 95%
Shiitake Mushrooms (Lentinula):
- Temperature: 41°F (5°C) to 46°F (8°C)
- Humidity: 85% to 90%
Oyster Mushrooms (Pleurotus):
- Temperature: 37°F (3°C) to 41°F (5°C)
- Humidity: 90% to 95%
Enoki Mushrooms (Flammulina velutipes):
- Temperature: 37°F (3°C) to 41°F (5°C)
- Humidity: 95% to 100%
Chanterelle Mushrooms (Cantharellus cibarius):
- Temperature: 32°F (0°C) to 36°F (2°C)
- Humidity: 90% to 95%
Morel Mushrooms (Morchella spp.):
- Temperature: 32°F (0°C) to 36°F (2°C)
- Humidity: 85% to 90%
These temperature and humidity ranges are general guidelines and can vary slightly depending on the specific mushroom variety and its tolerance to environmental conditions. It’s important to note that maintaining consistent temperature and humidity levels within these ranges is crucial for prolonging the freshness and quality of mushrooms.
To achieve the appropriate humidity levels, you can use a humidifier or place a damp cloth or tray of water near the mushrooms. However, be cautious not to make the environment too wet, as excess moisture can lead to mold growth or accelerated spoilage.
By storing different mushroom varieties at their respective ideal temperature and humidity levels, you can help preserve their flavor, texture, and overall quality for a longer duration.
Tips to prevent moisture buildup and maintain freshness
To prevent moisture buildup and maintain the freshness of mushrooms, follow these helpful tips:
- Avoid Washing Until Ready to Use: Excess moisture can accelerate spoilage, so it’s best to avoid washing mushrooms until you’re ready to cook or consume them. Washing mushrooms introduces additional moisture, which can lead to faster deterioration.
- Properly Dry Mushrooms: If your mushrooms are damp or have excess moisture on them, gently pat them dry with a paper towel or a clean cloth before storing. Removing surface moisture helps prevent moisture buildup in the storage container.
- Use Breathable Storage Containers: Opt for breathable storage containers, such as paper bags or mesh bags, that allow for air circulation. These containers help reduce moisture buildup and maintain the mushrooms’ freshness. Avoid using airtight plastic containers, as they can trap moisture and promote spoilage.
- Arrange Mushrooms in a Single Layer: Avoid overcrowding the mushrooms in the storage container. Arrange them in a single layer or loosely pack them to allow airflow. Overcrowding can create a humid environment and increase the chances of moisture buildup.
- Regularly Check and Remove Moisture: Periodically inspect the storage container for any moisture accumulation. If you notice any condensation or excess moisture, gently wipe it away using a clean cloth or paper towel. Maintaining a dry environment helps preserve the mushrooms’ quality.
- Store in a Cool, Dry Place: Keep the mushrooms in a cool and dry location. Avoid storing them in areas prone to humidity, such as near the sink or stove. Excessive heat and moisture can accelerate spoilage. The refrigerator is generally the best place to store fresh mushrooms, as it provides a controlled environment.
- Separate Mushrooms from Moist Produce: If storing mushrooms in the refrigerator, make sure to separate them from other produce items that release moisture, such as fruits or vegetables with high water content. Keeping them separate helps prevent moisture transfer and reduces the risk of moisture buildup.
- Use Silica Gel Packs: Placing silica gel packs in the storage container can help absorb excess moisture and maintain a dry environment. These packs are available in many stores and can be reused or regenerated by drying them out in the oven.
- Monitor Storage Conditions: Regularly check the temperature and humidity levels in the storage area or refrigerator. Use a thermometer and hygrometer to ensure the conditions are within the recommended ranges for mushroom storage.
By following these tips, you can minimize moisture buildup, reduce the risk of spoilage, and maintain the freshness of your mushrooms for a longer period. Remember that keeping mushrooms dry is essential in preserving their quality and extending their shelf life.
Drying
Benefits of drying mushrooms for long-term storage
Drying mushrooms is a popular method for long-term storage, and it offers several benefits:
- Extended Shelf Life: Drying mushrooms significantly extends their shelf life. By removing the moisture content, the growth of bacteria, mold, and other microorganisms that cause spoilage is inhibited. Properly dried mushrooms can be stored for several months or even years without significant loss in quality.
- Concentrated Flavor: Drying mushrooms intensifies their flavor. The removal of water concentrates the natural flavors, resulting in a more robust and potent taste. Dried mushrooms often have a rich umami flavor that can enhance the depth and complexity of dishes.
- Versatility in Recipes: Dried mushrooms have a concentrated flavor profile that makes them versatile in various culinary preparations. They can be rehydrated and used in soups, stews, sauces, stir-fries, risottos, and more. The rehydration process allows the mushrooms to regain their texture and impart their unique flavor to dishes.
- Space-Saving Storage: Compared to fresh mushrooms, dried mushrooms take up significantly less space. This makes them convenient for storage, especially for those with limited pantry or freezer space. The compact size of dried mushrooms allows for easy organization and efficient utilization of storage areas.
- Availability Year-Round: Dried mushrooms provide a convenient solution for enjoying mushrooms year-round, even when they are out of season. By preserving them through drying, you can have a supply of mushrooms readily available regardless of the time of year.
- Nutritional Retention: Drying mushrooms preserves many of their essential nutrients. While some heat-sensitive vitamins, such as vitamin C, may be reduced during the drying process, mushrooms remain a good source of dietary fiber, minerals (such as potassium and selenium), and other beneficial compounds.
- Easy to Use: Dried mushrooms are easy to use in cooking. Simply rehydrate them by soaking in hot water or broth for a period of time, typically ranging from 15 minutes to an hour, depending on the mushroom variety and size. The rehydrated mushrooms can then be incorporated into recipes just like fresh mushrooms.
- Cost-Effective: Drying mushrooms can be a cost-effective option, especially when purchasing fresh mushrooms in bulk or when foraging your own. Drying allows you to preserve excess mushrooms and avoid waste, ensuring that you have a supply of mushrooms for future use without incurring additional costs.
By drying mushrooms, you can enjoy their unique flavor, make the most of seasonal harvests, and have a readily available ingredient for various culinary applications. It’s an excellent preservation method that provides convenience and versatility in the kitchen while retaining the essence of these culinary delights.
Step-by-step instructions for air drying and using a food dehydrator
Air Drying:
- Clean the mushrooms: Start by gently brushing off any dirt or debris from the mushrooms using a soft brush or a damp cloth. Avoid soaking or rinsing them in water, as excessive moisture can prolong the drying process.
- Slice the mushrooms (optional): If desired, slice the mushrooms into thin, uniform pieces. This step helps to speed up the drying process and ensures even drying.
- Arrange the mushrooms: Place the cleaned or sliced mushrooms in a single layer on a clean drying rack, a wire mesh, or a food-grade drying screen. Make sure there is enough space between the mushrooms for air circulation.
- Choose a suitable drying location: Find a well-ventilated area with low humidity. Ideally, it should be a warm, dry spot away from direct sunlight. Good air circulation helps facilitate the drying process and prevents moisture buildup.
- Allow the mushrooms to air dry: Leave the mushrooms undisturbed in the chosen drying location. Depending on the mushroom variety and thickness, the drying process can take anywhere from several days to a couple of weeks. The mushrooms are considered dry when they are brittle and snap easily.
- Store the dried mushrooms: Once completely dry, transfer the mushrooms to clean, airtight containers such as glass jars or food-grade plastic bags. Store them in a cool, dark place away from moisture and light to maintain their quality and flavor. Properly dried mushrooms can be stored for months or even years.
Using a Food Dehydrator:
- Clean and slice the mushrooms: Begin by cleaning the mushrooms as described in step 1 of the air drying method. Optionally, slice the mushrooms into thin, uniform pieces to promote even drying.
- Preheat the food dehydrator: Follow the manufacturer’s instructions to preheat the food dehydrator to the recommended temperature for drying mushrooms. Typically, a temperature between 95°F (35°C) and 135°F (57°C) is suitable for most mushroom varieties.
- Arrange the mushrooms on the dehydrator trays: Place the cleaned or sliced mushrooms in a single layer on the dehydrator trays. Ensure there is enough space between the mushrooms to allow for proper airflow and drying.
- Set the drying time: Adjust the timer or set the desired drying time according to the recommendations for your specific mushroom variety. Drying times can vary, typically ranging from 2 to 8 hours, depending on the mushroom thickness and moisture content.
- Monitor the drying process: Regularly check the progress of the mushrooms as they dry. Rotate the trays or rearrange the mushrooms if needed to ensure even drying. Remove any mushrooms that are fully dried while allowing others to continue drying.
- Test for dryness: To determine if the mushrooms are completely dry, remove a piece and allow it to cool. The mushroom should be dry, crisp, and brittle. If there is any remaining moisture, return the mushrooms to the dehydrator for further drying.
- Cool and store the dried mushrooms: Once fully dried, let the mushrooms cool down before storing. Transfer them to clean, airtight containers such as glass jars or food-grade plastic bags. Store the dried mushrooms in a cool, dark place away from moisture and light for long-term storage.
Whether you choose to air dry or use a food dehydrator, the dried mushrooms will be ready to use in various recipes, adding a concentrated burst of flavor to your dishes.
Proper storage containers and conditions for dried mushrooms
To ensure the long-term quality and freshness of dried mushrooms, it’s essential to store them properly. Here are some guidelines for choosing storage containers and maintaining optimal conditions:
- Airtight Containers: Select clean, airtight containers for storing dried mushrooms. Glass jars with tight-fitting lids, food-grade plastic bags, or vacuum-sealed bags are suitable options. Airtight containers help prevent moisture, air, and contaminants from entering and affecting the mushrooms’ quality.
- Labeling: Label the containers with the type of mushroom and the date of drying. This information will help you keep track of the storage duration and easily identify the specific mushroom variety when needed.
- Cool and Dark Environment: Store the dried mushrooms in a cool, dark place. Exposure to light and heat can degrade the quality and flavor of the mushrooms over time. A pantry or cupboard away from direct sunlight is ideal. Avoid storing them near heat sources like stoves or ovens.
- Consistent Temperature: Maintain a relatively consistent temperature in the storage area. Fluctuations in temperature can cause moisture condensation, leading to potential spoilage. Aim for a temperature range between 50°F (10°C) and 70°F (21°C) for optimal storage.
- Low Humidity: Keep the storage area dry and maintain low humidity levels. High humidity can lead to moisture absorption by the dried mushrooms, causing them to become soft and potentially moldy. Ideally, the humidity level should be below 60% to ensure the longevity of the dried mushrooms.
- Protection from Pests: Protect the dried mushrooms from pests such as insects or rodents. Ensure that the storage area is clean and free from any existing pest infestations. Consider using pest deterrents like lavender sachets, bay leaves, or food-grade diatomaceous earth around the storage area to repel pests.
- Avoid Freezing Dried Mushrooms: While freezing can preserve certain food items, it is generally not recommended for dried mushrooms. The freezing process can cause changes in texture and flavor, compromising the quality of the mushrooms. It’s best to store them at room temperature in a suitable container.
- Regular Inspection: Periodically check the stored dried mushrooms for any signs of moisture, mold growth, or insect activity. If you notice any issues, discard the affected mushrooms and transfer the remaining ones to a new, clean container.
By following these storage guidelines, you can maintain the flavor, texture, and nutritional value of dried mushrooms for an extended period. Proper storage conditions play a crucial role in preserving their quality, ensuring you have a ready supply of delicious mushrooms to enhance your culinary creations.
Freezing
Techniques for freezing mushrooms to preserve their quality
Freezing mushrooms can be a convenient method for preserving their quality and extending their shelf life. Here are some techniques for freezing mushrooms effectively:
- Clean and Prepare: Start by cleaning the mushrooms thoroughly. Gently brush off any dirt or debris using a soft brush or a damp cloth. Avoid soaking or rinsing them in water, as mushrooms are porous and can absorb excess moisture. Trim any tough or discolored parts and slice them to your desired thickness, if preferred.
- Blanching (Optional): Blanching is a pre-freezing step that helps preserve the texture and color of mushrooms. While it’s not necessary for all mushroom varieties, it can be beneficial for some. To blanch, bring a pot of water to a boil and add the mushrooms for a brief period (usually 1-2 minutes). Then, immediately transfer them to an ice bath to halt the cooking process. Drain and pat dry before freezing.
- Flash-Freezing: Arrange the cleaned and prepared mushrooms in a single layer on a baking sheet or tray. Make sure the mushrooms are not touching each other to prevent them from sticking together during freezing. Place the tray in the freezer and allow the mushrooms to freeze individually. This technique, known as flash-freezing, prevents the mushrooms from clumping together, making it easier to remove the desired quantity later.
- Packaging: Once the mushrooms are individually frozen, transfer them into suitable freezer-safe containers or resealable freezer bags. Squeeze out excess air from the bags before sealing to minimize the risk of freezer burn. Label the containers or bags with the date of freezing for easy reference.
- Freezer Placement: Place the packed mushrooms in the coldest part of the freezer, such as the back or bottom shelf, to maintain a consistent freezing temperature. Avoid storing them near the freezer door, as it is more susceptible to temperature fluctuations.
- Thawing and Usage: When you’re ready to use the frozen mushrooms, there are a couple of methods you can employ:
- Thawing in the Refrigerator: Transfer the desired quantity of frozen mushrooms to a bowl or plate and allow them to thaw in the refrigerator overnight. Thawed mushrooms can be used in various cooked dishes, such as soups, stir-fries, sauces, or sautés.
- Cooking from Frozen: If you prefer, you can add frozen mushrooms directly to recipes without thawing. Keep in mind that the cooking time may be slightly longer than when using fresh or thawed mushrooms.
By following these techniques, you can freeze mushrooms effectively, preserving their texture, flavor, and nutritional value for future use. Freezing provides a convenient way to enjoy mushrooms out of season and adds versatility to your culinary endeavors.
Pre-blanching and flash-freezing methods
Pre-blanching and flash-freezing are techniques commonly used when freezing mushrooms to help maintain their quality and prevent them from clumping together. Here’s a step-by-step guide on pre-blanching and flash-freezing mushrooms:
Pre-blanching:
- Clean the mushrooms: Start by cleaning the mushrooms thoroughly. Gently brush off any dirt or debris using a soft brush or a damp cloth. Avoid soaking or rinsing them in water, as mushrooms are porous and can absorb excess moisture.
- Trim and slice (if desired): Trim any tough or discolored parts of the mushrooms. You can also slice them to your desired thickness, if preferred. This step is optional and depends on your preference and intended use of the mushrooms.
- Prepare a pot of boiling water: Fill a pot with water and bring it to a rolling boil. The pot should be large enough to accommodate the mushrooms without overcrowding.
- Blanch the mushrooms: Carefully place the mushrooms into the boiling water. Allow them to blanch for a brief period, typically 1-2 minutes. Blanching helps to partially cook the mushrooms and preserve their texture and color.
- Ice bath: Once blanched, immediately transfer the mushrooms to a bowl filled with ice water. The ice water bath stops the cooking process and helps retain the mushrooms’ texture and color. Leave them in the ice water for the same duration as the blanching time.
- Drain and pat dry: Remove the mushrooms from the ice water and drain them thoroughly. Gently pat them dry with a clean kitchen towel or paper towels. Ensure they are completely dry before proceeding to the next step.
Flash-Freezing:
- Arrange the mushrooms: Place the blanched and dried mushrooms in a single layer on a baking sheet or tray. Make sure they are spaced apart and not touching each other. This allows for proper airflow and prevents them from sticking together during freezing.
- Place in the freezer: Transfer the baking sheet or tray with the mushrooms to the freezer. Keep them in the freezer until they are individually frozen, typically for 1-2 hours. Flash-freezing allows each mushroom to freeze quickly and independently.
- Packaging: Once the mushrooms are individually frozen, transfer them into suitable freezer-safe containers or resealable freezer bags. Squeeze out excess air from the bags before sealing them to minimize the risk of freezer burn. Label the containers or bags with the date of freezing for easy reference.
- Freezer storage: Place the packed mushrooms in the coldest part of the freezer, such as the back or bottom shelf. Avoid storing them near the freezer door, as it is more prone to temperature fluctuations.
By following these pre-blanching and flash-freezing methods, you can preserve the quality of mushrooms while preventing them from clumping together. This ensures that you have individual, easily portioned mushrooms available for use whenever needed.
Best practices for packaging and labeling frozen mushrooms
Proper packaging and labeling of frozen mushrooms are essential for maintaining their quality and ensuring easy identification. Here are some best practices to follow:
Packaging:
- Freezer-Safe Containers: Use freezer-safe containers or resealable freezer bags specifically designed for long-term freezer storage. These containers should be durable, airtight, and able to withstand low temperatures without cracking or leaking.
- Portion Sizes: Consider packaging the mushrooms in portion sizes that are convenient for your recipes. This way, you can easily remove and thaw the amount you need without defrosting the entire batch.
- Single Layer: Arrange the mushrooms in a single layer inside the containers or freezer bags. This helps prevent them from sticking together and allows for even freezing and thawing.
- Remove Excess Air: Squeeze out as much air as possible from the bags before sealing them. Excess air can contribute to freezer burn and degrade the quality of the mushrooms. You can use a straw to remove the remaining air or consider vacuum-sealing for optimal results.
Labeling:
- Date: Clearly label the containers or bags with the date of freezing. This helps you keep track of the storage duration and ensures you use the oldest mushrooms first.
- Mushroom Variety: If you have different types of mushrooms stored, it’s helpful to label each container or bag with the specific mushroom variety. This makes it easier to identify and select the desired mushrooms for your recipes.
- Quantity: Optionally, you can also label the containers with the quantity or weight of mushrooms inside. This provides additional information when planning your meals or determining the amount to thaw.
- Additional Notes: If there are any specific details or instructions relevant to the frozen mushrooms, such as pre-blanching or blanching times, you can include them as additional notes on the label.
Proper Storage:
- Freezer Location: Store the packaged mushrooms in the coldest part of the freezer, such as the back or bottom shelf, to maintain a consistent temperature. Avoid placing them near the freezer door, as it’s more prone to temperature fluctuations.
- Organization: Keep the frozen mushrooms organized by grouping them by type or labeling them in categories. This makes it easier to locate and access the desired mushrooms when needed.
- First In, First Out (FIFO): Arrange the frozen mushrooms with the oldest containers at the front or top. This practice ensures that you use the mushrooms in the order they were frozen, reducing the chances of them remaining in storage for an extended period.
By following these packaging and labeling best practices, you can maintain the quality of your frozen mushrooms and easily identify them when it’s time to use them in your culinary creations.
Extending Mushroom Shelf Life
Canning
Overview of the canning process for mushrooms
Canning mushrooms is a popular method for preserving them for an extended period. Here’s an overview of the canning process for mushrooms:
1. Selecting and Preparing Mushrooms:
- Choose fresh, high-quality mushrooms for canning. Look for firm and unblemished mushrooms without any signs of spoilage.
- Clean the mushrooms thoroughly by gently brushing off any dirt or debris. Avoid soaking them in water as mushrooms are porous and can absorb excess moisture.
- Trim any tough or discolored parts of the mushrooms. You can choose to slice or quarter them, depending on your preference.
2. Sterilizing Canning Jars:
- Wash the canning jars, lids, and bands in hot, soapy water. Rinse them well.
- Place the jars in a large pot and cover them with water. Bring the water to a boil and let the jars boil for 10 minutes to sterilize them.
- In a separate small pot, simmer the lids to soften the sealing compound.
3. Preparing the Canning Liquid:
- Prepare a canning liquid or brine to pour over the mushrooms in the jars. This can be a mixture of water, vinegar, salt, and any desired herbs or spices for flavor. Follow a trusted recipe for proper proportions and taste.
4. Filling the Jars:
- Remove the sterilized jars from the boiling water using jar lifters, draining them well. Place the jars on a clean towel.
- Pack the prepared mushrooms tightly into the jars, leaving about a 1-inch (2.5 cm) headspace at the top.
- Carefully pour the hot canning liquid over the mushrooms, ensuring they are fully submerged. Maintain the 1-inch headspace.
5. Removing Air Bubbles and Sealing:
- Gently tap the jars on a towel or use a non-metallic tool, such as a bubble remover or a chopstick, to remove any trapped air bubbles.
- Wipe the jar rims clean with a damp cloth to ensure a proper seal.
- Place the softened lids on the jars and screw the bands on until they are fingertip-tight. Do not overtighten.
6. Processing the Jars:
- Lower the filled and sealed jars into a canner or large pot with a rack. The water in the canner should cover the jars by about 1 to 2 inches (2.5 to 5 cm).
- Bring the water to a rolling boil and process the jars for the specified time according to a trusted recipe. The processing time depends on the size of the jars and the altitude of your location.
- After the processing time is complete, turn off the heat and let the jars sit in the canner for a few minutes to settle.
7. Cooling, Testing, and Storing:
- Using jar lifters, carefully remove the jars from the canner and place them on a towel-lined surface away from drafts.
- Let the jars cool completely, undisturbed, for 12 to 24 hours. During this time, you may hear a “pop” sound, indicating that the jars have properly sealed.
- After cooling, test the seal by pressing the center of the lids. If the lids don’t flex, they are sealed correctly. If a lid pops back, refrigerate that jar and use it promptly.
- Label the sealed and cooled jars with the contents and date before storing them in a cool, dark place. Properly sealed jars can be stored for up to a year or as recommended by trusted canning guidelines.
It’s important to note that canning should be done using tested recipes and proper canning methods to ensure food safety. Follow reputable canning resources!
Safety precautions and recommended canning methods
When it comes to canning mushrooms or any other food, it’s crucial to prioritize safety to prevent the growth of harmful bacteria and ensure the long-term preservation of your food. Here are some important safety precautions and recommended canning methods to follow:
- Use Trusted Recipes: Always use tested and reputable canning recipes from reliable sources, such as government extension services, reputable canning books, or trusted canning websites. These recipes have been scientifically developed to ensure safe processing times and ingredient proportions.
- Follow Processing Times: Processing times specified in canning recipes are essential to destroy any harmful bacteria and create a vacuum seal. It’s crucial to follow the recommended processing times based on the size of the jars, the acidity of the recipe, and the altitude of your location. Underprocessing can lead to food spoilage and potential health risks.
Use Proper Canning Equipment:
- Canning Jars: Choose high-quality, heat-resistant glass canning jars specifically designed for home canning. Ensure they are free from chips or cracks that could compromise the seal.
- Two-Piece Lids: Use new, properly sized, two-piece canning lids for a secure and airtight seal. The lids consist of a flat metal lid and a screw-on band.
- Canning Pot or Pressure Canner: Use a canning pot or pressure canner, depending on the acidity of the recipe. Acidic foods can be safely processed in a boiling water canner, while low-acid foods require a pressure canner for safe processing.
- Properly Sterilize Jars: Before filling the jars, sterilize them to eliminate any bacteria that could spoil the food. This can be done by boiling the jars in water for a specified time or by using a dishwasher’s sterilization cycle.
- Ensure Proper Headspace: Leave the recommended headspace specified in the canning recipe between the top of the food and the jar’s rim. This headspace allows for expansion during processing and helps create a vacuum seal.
- Handle Hot Jars with Care: When filling and processing jars, always use jar lifters to handle hot jars to prevent burns and ensure a secure grip.
- Check Seals and Store Properly: After the jars have cooled completely, check the seals by pressing the center of the lids. If the lid pops back or is not firm, the jar is not sealed correctly, and the food should be refrigerated or reprocessed. Store properly sealed jars in a cool, dark place away from direct sunlight and extreme temperature fluctuations.
- Regularly Check for Spoilage: It’s important to periodically check your stored jars for any signs of spoilage, such as bulging lids, off smells, or unusual colors. If any jars show signs of spoilage, discard them immediately.
By following these safety precautions and recommended canning methods, you can ensure the safety and quality of your canned mushrooms and other home-canned foods. It’s important to stay informed about safe canning practices and consult trusted canning resources for up-to-date guidelines.
Storage considerations for canned mushrooms
When it comes to storing canned mushrooms, there are several important considerations to ensure their long-term quality and safety. Here are some storage guidelines to follow:
- Cool, Dark, and Dry Location: Store canned mushrooms in a cool, dark, and dry location to maintain their quality. Excessive heat, sunlight, and moisture can degrade the product and potentially lead to spoilage. Aim for a storage area with a consistent temperature, ideally between 50°F (10°C) and 70°F (21°C).
- Avoid Extreme Temperatures: Avoid storing canned mushrooms in areas subject to extreme temperature fluctuations, such as near ovens, stoves, or heaters. Drastic temperature changes can affect the seal integrity and compromise the product’s quality.
- Check for Seal Integrity: Regularly inspect the seals of canned mushroom jars. A properly sealed lid should be concave, indicating a vacuum seal. If you notice any bulging, leaking, or popped lids, it’s an indication of a compromised seal, and the product should be discarded immediately.
- Labeling and Rotation: Properly label each jar with the contents and the date of canning. Implement a “first in, first out” system to ensure that the oldest jars are used first. This helps prevent the cans from sitting in storage for an extended period, maximizing their freshness and quality.
- Shelf Life: Canned mushrooms, when properly processed and sealed, can have a shelf life of up to 1 to 2 years. However, for optimal quality and taste, it’s recommended to consume them within the first year. Always refer to the specific canning recipe or manufacturer’s recommendations for guidance on the shelf life of your particular canned mushrooms.
- Avoid Rust and Corrosion: Ensure that the storage area is free from excessive moisture and humidity to prevent rust or corrosion on the cans. Rust can compromise the integrity of the cans and lead to spoilage. Consider using shelving or storage racks that allow for proper airflow and minimize contact with damp surfaces.
- Discard Damaged or Spoiled Cans: Prior to use, inspect each canned mushroom jar for any signs of damage, such as dents, bulges, or leakage. If a can shows signs of spoilage, including off odors, strange colors, or mold growth, it should be discarded immediately. Do not consume canned mushrooms from compromised containers.
By following these storage considerations, you can ensure that your canned mushrooms remain safe, flavorful, and of high quality throughout their shelf life. Remember to always prioritize food safety and use your best judgment when consuming canned goods.
Preserving in Oil or Vinegar
Techniques for preserving mushrooms in oil or vinegar
Preserving mushrooms in oil or vinegar can be a flavorful and versatile way to enjoy them for an extended period. Here are some techniques for preserving mushrooms using oil or vinegar:
Preserving Mushrooms in Oil:
- Selecting and Preparing Mushrooms:
- Choose fresh, firm mushrooms without any signs of spoilage. Clean them gently by brushing off any dirt or debris.
- Trim any tough or discolored parts of the mushrooms and slice or quarter them according to your preference.
- Preparing the Oil:
- Select a high-quality oil with a neutral flavor, such as olive oil or sunflower oil. Ensure that the oil is fresh and not rancid.
- Heat the oil in a saucepan over low heat until it reaches a gentle simmer. Avoid boiling the oil as it can reduce its quality.
- Blanching the Mushrooms:
- Blanching the mushrooms before preserving them in oil helps to preserve their color and texture. Bring a pot of water to a boil and blanch the mushrooms for a few minutes until they become slightly tender.
- Drain the mushrooms and immediately transfer them to an ice bath to stop the cooking process. Pat them dry with a clean towel.
- Packing the Jars:
- Sterilize glass jars and lids by boiling them or using a dishwasher sterilization cycle.
- Layer the blanched mushrooms in the sterilized jars, leaving some headspace at the top.
- Pour the heated oil over the mushrooms, ensuring they are fully submerged. The oil acts as a protective barrier against spoilage.
- Storage and Usage:
- Seal the jars tightly and store them in a cool, dark place away from direct sunlight.
- Let the mushrooms infuse in the oil for at least a few days to develop flavors.
- Once opened, keep the jar in the refrigerator and use the mushrooms within a few weeks. Discard the jar if you notice any signs of spoilage.
Preserving Mushrooms in Vinegar:
- Selecting and Preparing Mushrooms:
- Choose fresh, firm mushrooms without any signs of spoilage. Clean them gently by brushing off any dirt or debris.
- Trim any tough or discolored parts of the mushrooms and slice or quarter them as desired.
- Preparing the Vinegar Solution:
- Select a vinegar with a mild flavor, such as white wine vinegar or apple cider vinegar.
- In a saucepan, heat the vinegar along with water and any desired spices or herbs for added flavor. Bring the solution to a gentle simmer.
- Blanching the Mushrooms:
- Similar to preserving in oil, blanch the mushrooms in boiling water for a few minutes until slightly tender.
- Drain the mushrooms and transfer them to an ice bath to cool down. Pat them dry with a clean towel.
- Packing the Jars:
- Sterilize glass jars and lids by boiling them or using a dishwasher sterilization cycle.
- Layer the blanched mushrooms in the sterilized jars, leaving some headspace at the top.
- Pour the vinegar solution over the mushrooms, ensuring they are fully submerged.
- Storage and Usage:
- Seal the jars tightly and store them in a cool, dark place away from direct sunlight.
- Allow the mushrooms to marinate in the vinegar solution for a few days to develop flavors.
- Once opened, keep the jar in the refrigerator and use the mushrooms within a few weeks. Discard the jar if you notice any signs of spoilage.
It’s important to note that preserved mushrooms in oil or vinegar should be stored and handled properly to prevent the growth of harmful bacteria. Always use clean utensils and containers, and discard any preserved mushrooms that show signs of contamination.
Flavoring options and storage recommendations
Flavoring Options for Preserving Mushrooms in Oil or Vinegar:
-
Herbs and Spices: Enhance the flavor of preserved mushrooms by adding herbs and spices. Common options include garlic cloves, thyme, rosemary, bay leaves, black peppercorns, or chili flakes. Experiment with different combinations to suit your taste preferences.
-
Aromatics: Consider incorporating aromatics like shallots, onions, or leeks into the oil or vinegar solution. They can add depth and complexity to the flavor profile of the preserved mushrooms.
-
Infused Oils: Infuse the oil with additional flavors by heating it with herbs or spices before pouring it over the mushrooms. This can impart a more intense flavor to the preserved mushrooms.
-
Blends and Combinations: Mix different types of mushrooms together or combine them with other ingredients like roasted red peppers, sun-dried tomatoes, or olives to create unique flavor combinations.
Storage Recommendations for Preserved Mushrooms in Oil or Vinegar:
-
Proper Sealing: Ensure that the jars are tightly sealed to prevent air and moisture from entering. This helps maintain the quality and safety of the preserved mushrooms.
-
Storage Location: Store the jars in a cool, dark place away from direct sunlight. Excessive heat or light can degrade the quality of the preserved mushrooms over time.
-
Refrigeration: While preserving mushrooms in oil or vinegar helps extend their shelf life, it’s advisable to store opened jars in the refrigerator. The cold temperature helps inhibit bacterial growth and preserves the flavor and texture of the mushrooms.
-
Monitoring: Regularly check the jars for any signs of spoilage, such as mold growth, off odors, or changes in texture. If you notice any abnormalities, discard the contents immediately.
-
Use within Recommended Timeframes: Preserved mushrooms in oil or vinegar can typically be enjoyed for several weeks or months, depending on the preservation method. Refer to the specific recipe or guidelines you followed for the recommended storage timeframe. It’s best to consume the mushrooms within the specified time to ensure optimal flavor and quality.
By incorporating flavorful ingredients and following proper storage practices, you can create delicious and long-lasting preserved mushrooms in oil or vinegar. Enjoy them in various culinary applications, such as salads, antipasti platters, pasta dishes, or as a tasty addition to sandwiches and wraps.
Pickling
Step-by-step instructions for pickling mushrooms
Pickling mushrooms is a wonderful way to preserve their flavor and enjoy them in a tangy and acidic brine. Here’s a step-by-step guide to pickling mushrooms:
- Selecting and Preparing Mushrooms:
- Choose fresh and firm mushrooms, preferably small to medium-sized button mushrooms or other varieties suitable for pickling.
- Clean the mushrooms thoroughly by brushing off any dirt or debris. Trim the stems if necessary.
- Blanching the Mushrooms:
- In a large pot, bring water to a boil. Add the mushrooms and blanch them for 2-3 minutes to partially cook and preserve their texture.
- Drain the mushrooms and immediately transfer them to an ice bath to cool rapidly. This helps retain their color and crispness.
- Once cooled, drain the mushrooms and set them aside.
- Preparing the Pickling Brine:
- In a saucepan, combine equal parts of water and vinegar (such as white vinegar or apple cider vinegar) and bring it to a boil.
- Add sugar, salt, and any desired spices or herbs (such as peppercorns, bay leaves, garlic cloves, or red pepper flakes) to the brine.
- Stir until the sugar and salt dissolve completely. Let the brine simmer for a few minutes to allow the flavors to infuse.
- Packing the Jars:
- Sterilize glass jars and lids by boiling them or using a dishwasher sterilization cycle.
- Place the blanched mushrooms into the sterilized jars, leaving some headspace at the top.
- Pour the hot pickling brine over the mushrooms, ensuring they are fully submerged. Use a clean utensil to remove any air bubbles.
- Sealing and Storing:
- Wipe the rims of the jars with a clean, damp cloth to remove any residue. Place the lids on the jars and tighten them securely.
- Allow the jars to cool at room temperature. As they cool, you may hear the lids pop, indicating a proper seal.
- Store the pickled mushrooms in a cool, dark place for at least a week before consuming to allow the flavors to develop fully.
- Refrigeration and Shelf Life:
- Once opened, store the pickled mushrooms in the refrigerator to maintain their quality and extend their shelf life.
- The pickled mushrooms can typically be enjoyed for several weeks to a few months, depending on the specific recipe and storage conditions.
- It’s important to monitor the jars for any signs of spoilage, such as mold growth or off odors. Discard any jars that show signs of spoilage.
Pickled mushrooms can be a versatile and delicious addition to salads, sandwiches, charcuterie boards, or enjoyed straight from the jar as a flavorful snack. Experiment with different seasonings and spices to create your own unique pickling recipes.
Different pickling recipes and flavor variations
When it comes to pickling mushrooms, there are various recipes and flavor variations you can explore. Here are a few different pickling recipes and flavor combinations to try:
- Classic Pickled Mushrooms:
- Ingredients: Button mushrooms, white vinegar, water, sugar, salt, peppercorns, garlic cloves, bay leaves.
- Flavor Profile: A classic pickling recipe with a balance of tanginess, sweetness, and aromatic undertones.
- Spicy Pickled Mushrooms:
- Ingredients: Button mushrooms, apple cider vinegar, water, sugar, salt, chili flakes, garlic cloves, black peppercorns.
- Flavor Profile: Adds a kick of heat and a bold, spicy flavor to the pickled mushrooms.
- Mediterranean Pickled Mushrooms:
- Ingredients: Cremini or mixed mushrooms, red wine vinegar, water, sugar, salt, garlic cloves, thyme, rosemary, black peppercorns.
- Flavor Profile: Infuses the pickled mushrooms with the flavors of the Mediterranean, including herbs and robust red wine vinegar.
- Asian-Inspired Pickled Mushrooms:
- Ingredients: Shiitake or oyster mushrooms, rice vinegar, soy sauce, water, sugar, ginger, garlic cloves, star anise.
- Flavor Profile: Delivers a blend of tangy, savory, and slightly sweet notes, reminiscent of Asian cuisine.
- Dill Pickled Mushrooms:
- Ingredients: Button mushrooms, white wine vinegar, water, sugar, salt, dill sprigs, garlic cloves, mustard seeds.
- Flavor Profile: Offers a fresh and herbaceous taste with the distinctive flavor of dill complementing the mushrooms.
- Sweet and Sour Pickled Mushrooms:
- Ingredients: Button mushrooms, rice vinegar, water, sugar, salt, pineapple juice, bell peppers (sliced), onion (sliced).
- Flavor Profile: Combines the flavors of sweetness and tanginess, creating a delightful balance in the pickling brine.
Feel free to adjust the ingredients and quantities according to your taste preferences. You can also experiment with different types of mushrooms, such as portobello, chanterelle, or enoki, to create unique flavor combinations. Remember to follow proper pickling procedures, including sterilizing jars, sealing them tightly, and allowing the pickled mushrooms to develop flavors by storing them for at least a week before consuming.
Pickled mushrooms can be enjoyed as a topping for salads, sandwiches, or burgers, incorporated into pasta or grain dishes, or served as part of a charcuterie platter. Let your taste buds guide you in exploring different flavor variations to find your favorite pickled mushroom recipe.
Proper storage and shelf life of pickled mushrooms
Proper storage is essential to maintain the quality and extend the shelf life of pickled mushrooms. Here are some guidelines:
-
Storage Containers: Store pickled mushrooms in glass jars with tight-fitting lids. Ensure the jars are clean and sterilized before use to prevent any contamination.
-
Cool and Dark Location: Store the jars of pickled mushrooms in a cool and dark place, such as a pantry or cupboard. This helps maintain the flavor and texture of the mushrooms.
-
Refrigeration after Opening: Once you open a jar of pickled mushrooms, it’s best to store it in the refrigerator. The cold temperature helps slow down any bacterial growth and preserves the quality of the pickled mushrooms.
-
Monitoring for Spoilage: Regularly check the jars for any signs of spoilage, such as mold growth, off odors, or changes in color or texture. If you notice any abnormalities, discard the contents immediately.
-
Shelf Life: The shelf life of pickled mushrooms can vary depending on the recipe, ingredients, and storage conditions. In general, properly stored pickled mushrooms can last several months to a year. However, for the best quality, it’s recommended to consume them within 6-12 months of pickling.
It’s important to note that the quality of pickled mushrooms may change over time, and they might become softer or lose some of their crunchiness. As with any preserved food, trust your senses and use your judgment to determine if the pickled mushrooms are still safe to consume.
Enjoy your pickled mushrooms as a flavorful addition to sandwiches, salads, antipasti platters, or as a tasty snack straight from the jar. Remember to label your jars with the date of pickling to keep track of their freshness.
Conclusion
Recap of key points for successful mushroom harvesting and storage
- Importance of Proper Harvesting and Storage:
- Proper harvesting and storage techniques help maintain the flavor, texture, and nutritional value of mushrooms.
- Indications of Mushroom Readiness for Harvest:
- Look for fully grown mushrooms with open caps and visible gills or pores, avoiding overmature or damaged specimens.
- Factors to Consider When Choosing Mushroom Varieties to Cultivate:
- Consider factors such as growing conditions, cultivation difficulty, flavor preferences, and culinary uses when selecting mushroom varieties to cultivate.
- Timing for Maximum Flavor and Nutritional Value:
- Harvest mushrooms when they are fully mature but before they become overripe or start to deteriorate. This ensures optimal flavor and nutritional value.
- Step-by-Step Instructions for Safe Mushroom Harvesting:
- Use clean, sharp tools to carefully cut or twist mushrooms at the base of the stem. Handle them gently to avoid damage.
- Tools and Equipment for Efficient Harvesting:
- Carry a basket or container, a small knife or scissors for cutting mushrooms, and a brush for cleaning off debris.
- Best Practices to Minimize Mushroom Damage:
- Avoid squeezing or pressing mushrooms during harvesting. Handle them with care to preserve their structure and appearance.
- Importance of Cleaning Mushrooms Before Storage:
- Cleaning mushrooms removes dirt, debris, and potential contaminants. It helps maintain their freshness and prevents spoilage.
- Proper Techniques for Cleaning Different Mushroom Types:
- Brush delicate mushrooms gently with a soft brush or wipe them with a damp cloth. Rinse more robust mushrooms briefly and pat them dry.
- Sorting Methods to Remove Damaged or Spoiled Mushrooms:
- Inspect harvested mushrooms and remove any damaged, bruised, or spoiled ones. This prevents the spread of decay to other mushrooms during storage.
- Strategies to Extend Mushroom Shelf Life:
- Keep mushrooms in a cool, well-ventilated space with proper airflow. Avoid exposure to direct sunlight, heat, or excess moisture.
- Trimming and Cutting Techniques for Optimal Storage:
- Trim mushroom stems as needed, removing any damaged or discolored parts. Slice or chop mushrooms according to your recipe or storage preferences.
- Recommended Storage Containers and Packaging Materials:
- Store mushrooms in breathable containers, such as paper bags or porous containers, to maintain airflow and reduce moisture buildup.
- Guidelines for Storing Mushrooms in the Refrigerator:
- Place cleaned and trimmed mushrooms in a paper bag or breathable container. Store them in the refrigerator’s crisper drawer for optimal freshness.
- Ideal Temperature and Humidity Levels for Different Mushroom Varieties:
- Generally, mushrooms prefer cool temperatures between 34-45°F (1-7°C) and humidity levels around 85-95%. However, specific varieties may have different requirements.
- Tips to Prevent Moisture Buildup and Maintain Freshness:
- Avoid washing mushrooms before storage as it can increase moisture content. Use breathable containers and remove any excess moisture if necessary.
- Benefits of Drying Mushrooms for Long-Term Storage:
- Drying mushrooms preserves them for an extended period, concentrates their flavors, and provides versatile culinary uses.
- Step-by-Step Instructions for Air Drying and Using a Food Dehydrator:
- Air drying: Clean and slice mushrooms, arrange them in a single layer, and dry them in a well-ventilated area. A food dehydrator can also be used following the manufacturer’s instructions.
- Proper Storage Containers and Conditions for Dried Mushrooms:
- Store dried mushrooms in airtight containers, away from moisture and direct sunlight. Keep them in a cool, dark place to maintain their quality.
- Techniques for Freezing Mushrooms to Preserve Quality:
- Blanch mushrooms briefly, cool them quickly, and pack them in airtight containers or freezer bags. Freezing helps retain the flavor and texture of mushrooms.
- Pre-Blanching and Flash-Freezing Methods:
- Pre-blanching: Briefly boil mushrooms before freezing to preserve their quality. Flash-freezing: Arrange blanched mushrooms in a single layer on a baking sheet and freeze them before transferring to containers.
- Best Practices for Packaging and Labeling Frozen Mushrooms:
- Pack frozen mushrooms in airtight containers or freezer bags, removing excess air to prevent freezer burn. Label containers with the date of freezing for easy reference.
- Overview of the Canning Process for Mushrooms:
- Canning mushrooms involves packing them in sterilized jars, adding a brine or liquid, and processing the jars in a water bath or pressure canner.
- Safety Precautions and Recommended Canning Methods:
- Follow proper canning guidelines, including sterilizing jars, using tested recipes, and processing jars at the recommended temperatures and times to ensure safety.
- Storage Considerations for Canned Mushrooms:
- Store canned mushrooms in a cool, dark place. Check jars for any signs of spoilage before consuming, and consume within the recommended timeframes for optimal quality.
- Techniques for Preserving Mushrooms in Oil or Vinegar:
- Submerge cleaned and trimmed mushrooms in oil or vinegar-based solutions, adding flavorings like herbs, spices, and aromatics.
- Flavoring Options and Storage Recommendations:
- Experiment with different herbs, spices, and additional ingredients to create unique flavor profiles. Store preserved mushrooms in properly sealed jars in a cool, dark place.
Importance of adapting techniques based on mushroom variety
Adapting techniques based on the specific mushroom variety is crucial for successful harvesting and storage. Here’s why it’s important:
-
Optimal Harvesting Time: Different mushroom varieties have varying growth patterns and maturity stages. Adapting the harvesting technique based on the specific variety ensures that you pick the mushrooms at their optimal stage of maturity, maximizing flavor, texture, and nutritional value.
-
Handling Sensitivity: Some mushroom varieties are more delicate and prone to damage compared to others. Adapting the handling technique based on the sensitivity of the mushrooms helps prevent bruising, discoloration, or structural damage during harvesting and subsequent storage.
-
Cleaning and Preparation: Each mushroom variety may require different cleaning methods. For example, some varieties may require gentle brushing or wiping, while others may need a quick rinse. Adapting the cleaning technique based on the specific variety ensures effective removal of dirt and debris without compromising their delicate features.
-
Storage Conditions: Mushroom varieties can have different preferences for temperature, humidity, and airflow. Adapting the storage conditions based on the specific variety helps maintain the mushrooms’ freshness, flavor, and texture for an extended period. This includes adjusting the storage temperature, moisture levels, and ventilation to meet the requirements of the particular variety.
-
Preservation Techniques: Different mushroom varieties respond differently to preservation methods such as drying, freezing, canning, or pickling. Adapting the preservation techniques based on the specific variety ensures that the mushrooms retain their quality, taste, and appearance throughout the preservation process.
-
Shelf Life: Mushroom varieties can vary in their shelf life, even when stored under optimal conditions. Adapting the storage duration based on the specific variety helps ensure that you consume the mushrooms before they lose their freshness or start to deteriorate.
By adapting techniques to suit the characteristics of each mushroom variety, you can optimize the quality, flavor, and longevity of your harvested mushrooms, enhancing your overall culinary experience.
Experiment and enjoy the benefits of homegrown mushrooms
Experimenting with homegrown mushrooms can be a rewarding and enjoyable experience. Here’s some encouragement to explore and appreciate the benefits of homegrown mushrooms:
-
Flavor Exploration: Homegrown mushrooms offer a vast array of flavors, textures, and aroma profiles that can elevate your culinary creations. From earthy and nutty to savory and delicate, each mushroom variety brings its unique taste to dishes. By experimenting with different mushroom varieties, you can discover new flavor combinations and enhance your culinary repertoire.
-
Nutritional Superiority: Homegrown mushrooms are packed with essential nutrients, including vitamins, minerals, and antioxidants. Incorporating them into your diet can contribute to a well-rounded and healthy eating plan. By growing and consuming your own mushrooms, you have direct control over the quality and freshness, ensuring maximum nutritional benefits.
-
Sustainable Practice: Growing your own mushrooms is an eco-friendly and sustainable practice. By reducing the need for commercially cultivated mushrooms, you minimize the carbon footprint associated with transportation and packaging. Additionally, you can reuse growing materials, such as compost or substrate, making it a resource-efficient and environmentally conscious endeavor.
-
Cost Savings: Cultivating mushrooms at home can be a cost-effective alternative to purchasing them from stores. Once you establish your mushroom-growing setup, you can enjoy a steady supply of fresh mushrooms without the recurring expense. It’s a budget-friendly way to savor gourmet mushrooms and explore their culinary versatility.
-
Educational and Therapeutic Value: Engaging in mushroom cultivation offers an opportunity for continuous learning and personal growth. It allows you to delve into the fascinating world of mycology, understanding the intricate processes of mushroom growth and cultivation. Gardening, including mushroom cultivation, can also provide a therapeutic and stress-relieving experience, connecting you with nature and promoting well-being.
-
Unique Culinary Creations: Homegrown mushrooms open doors to creativity in the kitchen. You can experiment with various cooking techniques, recipes, and flavor combinations to showcase the unique qualities of your harvested mushrooms. Whether it’s adding them to sauces, soups, stir-fries, or using them as a focal point in vegetarian dishes, the possibilities are endless.
Remember, don’t be afraid to venture into the world of homegrown mushrooms. Embrace the joy of experimenting, learning, and savoring the fruits of your labor. The benefits of homegrown mushrooms extend far beyond the plate, offering a fulfilling and enriching journey for any enthusiast. Enjoy the process, embrace the flavors, and relish the rewards of cultivating your own mushrooms.